A quick challenge to wake up your brain
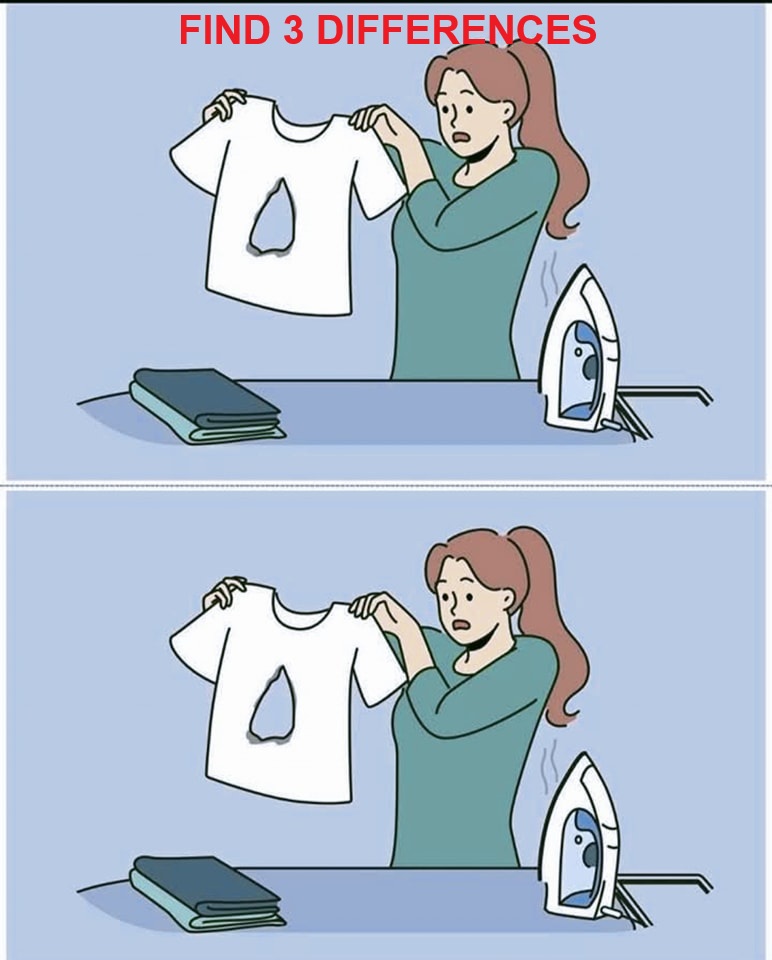
Ready for a fast, fun workout for your eyes and mind? In the picture puzzle above, you’re looking at two nearly identical scenes: a woman holding a T-shirt beside a stack of books and a hot iron on the table. Your mission is simple: find three tiny differences between the top panel and the bottom panel. Sounds easy, right? Don’t scroll too quickly—give yourself a minute. What jumps out first? Is it something about the shirt? The objects on the table? Or the iron’s control panel? Before you read the solution, pause, zoom in if you can, and note your three best guesses. Got them? Great—let’s play detective together.
Why this kind of puzzle is so addictive
Spot-the-difference games work because our brains love patterns. When two images seem the same, your visual system starts comparing edges, colors, and shapes at lightning speed. That tiny “aha!” when you notice a mismatch releases a little burst of satisfaction. It’s a harmless challenge, a test of attention, and a neat way to measure how carefully you see the world. And the best part? You can do it in under two minutes—on a lunch break, in line for coffee, or while waiting for a download to finish.
Common mistakes people make (and why small details trick us)
If you looked right at the pictures and felt overwhelmed, you’re not alone. Here are the classic pitfalls that cause people to miss obvious clues:
- Scanning too fast. Your eyes hop around without a system, so you keep checking the same areas and neglect others.
- Staring at the center only. Designers know your gaze gravitates toward faces and hands. That’s why differences often hide near the edges: the table line, object corners, or shadows.
- Ignoring “boring” objects. A book spine, a fold, or a tiny button looks unimportant—so your brain treats it as background noise. These are exactly the places puzzle makers love to tweak.
- Assuming symmetry. We expect objects (like a shirt hole or an iron’s panel) to look identical in both frames. That expectation blinds us to subtle changes in shape or layout.
- Chasing color alone. Not every clue is about hue. Many differences are about shape, position, or presence/absence of a feature.
When you slow down and adopt a method, the picture starts talking. Tiny mismatches turn into obvious flags.
Video :Can You Spot the Difference? 🧐
A method that never fails: the lighthouse sweep
Try this step-by-step approach any time you face a spot-the-difference challenge:
- Divide the scene into zones. Mentally grid the image into left, center, and right vertical bands (or top, middle, bottom). Here, we’ll use three focal zones: shirt, table stack, and iron.
- Do a quick outline check. Trace the outer silhouette of each main object with your eyes. Ask: Is the edge smooth or jagged? Any corners sticking out? Any missing pieces?
- Scan inside each object. Look for internal features: holes, buttons, seams, logos, folds, and reflections.
- Compare shadows and reflections. Puzzles often hide differences in shadow shapes, steam lines, or reflections on plastic and metal.
- Confirm with a second pass. After you spot one difference, resist the urge to celebrate too soon. Reset and sweep again; differences love to travel in pairs around the same area.
Now let’s apply that to today’s puzzle.
Zone 1: The T-shirt—something’s off with the tear
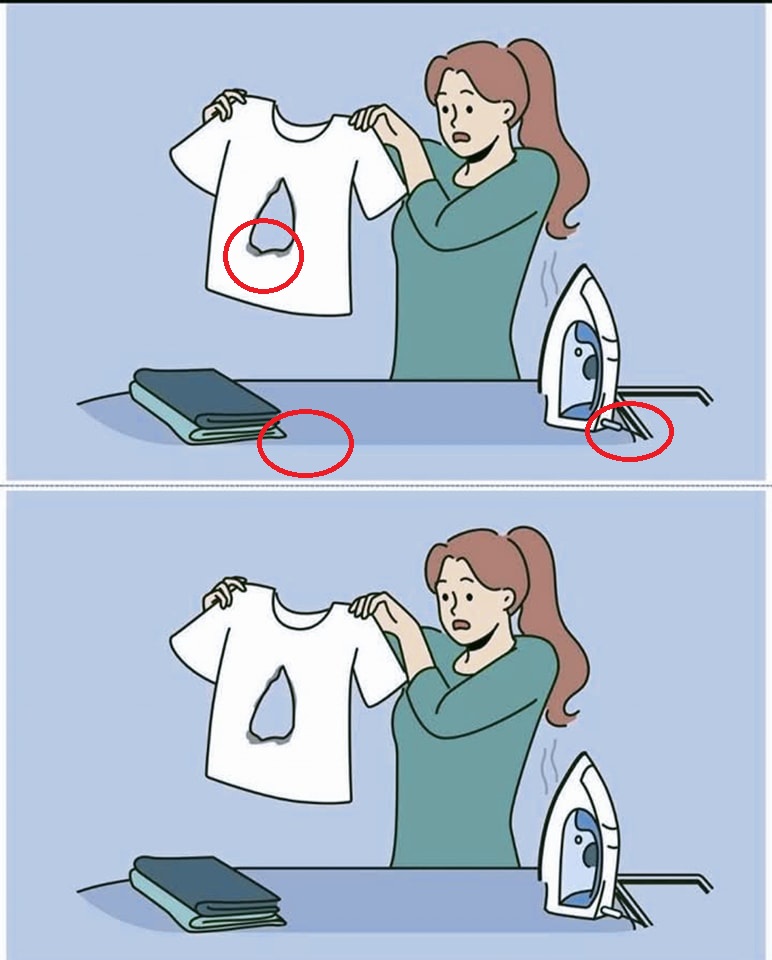
Start with the star of the scene: the white tee. In the top panel, the torn patch near the lower middle of the shirt has an extra flap and a different contour—it’s more irregular, with a small tongue-like piece curling inward. In the bottom panel, the hole is cleaner and more triangular, with the lower edge smoothed out. This isn’t a color trick; it’s a shape change. If you were scanning too quickly, your brain may have labeled it as “same hole, same spot,” and moved on. But look closely at the borders—the outline clearly differs.
✅ Difference #1: the torn patch on the shirt.
Zone 2: The book stack—watch the corner
Shift your eyes to the table on the left. Notice the folded item or book stack. In the top panel, one corner peeks out at an angle, creating a little triangular sliver that breaks the neat rectangle. In the bottom panel, that odd corner is tucked in; the stack looks tidier and flatter. It’s a tiny geometric adjustment, but once you see it, you can’t unsee it. Many solvers skip this because it’s not “interesting,” but boring edges are prime hiding spots.
✅ Difference #2: the book/stack—corner shape and position.
Zone 3: The iron—check the control button
Finally, move to the right side where the iron rests. The outline, stand, and steam puffs look similar—but the button on the iron is not. In the top panel, the control/button configuration differs from the bottom panel; the small round button detail changes (presence/position/shape), altering the look of the iron’s face. People often miss this because they focus on the hot soleplate or the steam, not the tiny controls.
✅ Difference #3: the iron’s button.
Why these three locations were strategic
Puzzles are designed to manipulate your attention. Here’s how today’s one guided your gaze:
- The shirt grabs attention first—it contains a big, high-contrast cutout. Designers tweak the contour rather than the location so your brain files it as “same object” and moves on.
- The book corner sits near the bottom edge where fewer people look. Edge-based changes blend into table lines and shadows.
- The iron button is a classic “micro-detail.” Our brains prefer big shapes and faces; small, circular controls barely register unless you intentionally check them.
Step-by-step replay: how to solve it cleanly
If you want to solve this like a pro next time, here’s the exact process I recommend:
- Step 1: Lock the silhouette. Outline the shirt, then the books, then the iron—top panel first, bottom panel second. Ask: Any extra spikes, bumps, or dips?
- Step 2: Inspect interiors. Focus on internal landmarks: the shirt’s hole; the book’s protruding corner; the iron’s button and window.
- Step 3: Verify with symmetry. For each object, compare left/right balance. The shirt’s tear should mirror its general shape—if one version looks more rounded or jagged, flag it.
- Step 4: Zoom on hardware. For appliances, check screws, dials, and buttons. Those are frequent switch-ups because they’re tiny yet visually meaningful.
- Step 5: Final cross-check. Close your eyes for two seconds, then open and scan diagonally from top-left to bottom-right. Anything still tugging your attention is often a real difference, not noise.
Video : Spot the difference|Japanese Pictures Puzzle No752
Your complete answer (spoiler, obviously!)
- The torn patch on the T-shirt is a different shape.
- The book/stack shows a changed corner/edge.
- The iron’s button differs between panels.
How to train your spot-the-difference superpower
Want to get quicker? Try these micro-habits:
- Count corners. Rectangles rarely keep the same number of visible angles after a tweak.
- Track circles and dots. Buttons, rivets, and screw heads are easy to add or remove.
- Follow lines. Seams, cords, and table edges sometimes shift by a pixel or two—enough to be a clue.
- Use a mental pointer. Move your attention like a clock hand around the image—12 o’clock, 3, 6, 9—so you don’t skip zones.
- Time yourself. A 60-second limit keeps you focused without rushing into guesswork.
Join the conversation
Now it’s your turn: Which one did you spot first? Did the torn patch catch your eye, or did the sneaky iron button get you? Drop your experience in the comments—tell us your time, the order you found them, and any techniques that helped. If you solved it with a friend or child, share how your strategies differed. Cooperative scanning can be surprisingly fast—and way more fun.

Share, challenge, level up
If you enjoyed this, pass it to a friend and see who finishes faster. Better yet, create a mini-tournament at home or in your classroom: one minute on the clock, three differences to beat, bragging rights on the line. These quick puzzles sharpen observation, patience, and logical comparison—the same skills you use in reading graphs, proofreading, or spotting errors in code.
Final encouragement
Keep going. The more puzzles you try, the sharper your eyes—and your attention—become. Today you trained your brain to notice shape, position, and tiny mechanical details. Tomorrow, try a set with color shifts, shadow tricks, or mirrored layouts. With a calm system and a steady sweep, you’ll surprise yourself with how much you can see. And remember: the small things aren’t small when they’re the clues that lead you to victory. Happy hunting!